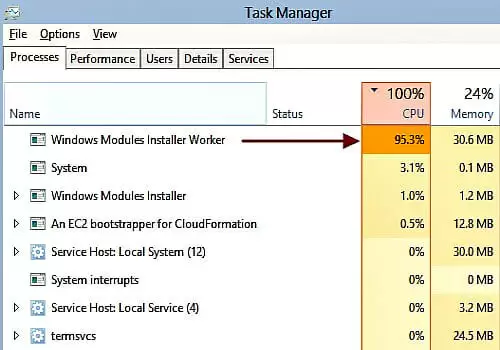
Windows Modules Installer Worker (TiWorker.exe) is a common problem in Windows PCs, especially those running Windows 10.

This error usually comes up when the WMI tool becomes unresponsive and uses most of your CPU resources.
Fortunately, you can fix this error. In this post, we’ve covered simple methods that will help you to resolve this problem. All methods are safe and work for 99% of people who experienced this problem.
What Is Windows Modules Installer Worker?
Windows Modules Installer worker is a Windows Update Service built into Windows to check for new updates and install them. As your PC looks for Windows updates or installs them, this service will be running in the background automatically.
However, sometimes the service may become unresponsive when looking for updates. This causes your PC to become very slow or unresponsive.
If you have encountered this problem, we’ll help you fix it in simple walkthrough guides. You can try the methods in the order they’ve been listed. But of course, you are free to jump to any method you are familiar with or seems easy.
NOTE: Before you begin, check if your Windows OS is running the Scheduled Automatic Maintenance task. If it is then you need to wait until it completes. To find its settings, go to Control Panel, click on All Control Panel Items, choose Security and Maintenance, and then Automatic Maintenance.
You may also encounter high CPU usage when Windows Update is running. Therefore, give it some time. Try running a full system scan for malware and viruses as well.
Otherwise, try the fixes below.
How to Fix Windows Modules Installer Worker High CPU Usage Error
You can easily solve this problem by simply following the step-by-step guides in this post.
Change Windows Update from Automatic to Manual
By now you probably know that Windows Modules Installer work error often comes up when you have issues with automatic Windows updates. This is a common problem in Windows 10, though you may encounter it when using Windows 8/7.
The easiest solution to this problem is to turn the Windows update to the manual. By doing this, it means that the Windows update process with not take place automatically in the background.
As a result, you won’t encounter issues with WMIW becoming unresponsive and consuming most of your CPU resources.
Steps to Change from Automatic to Manual:
- Press the Windows key + R key on your keyboard to open the Run dialogue box
- Type services.msc in the dialogue box and click on OK to proceed
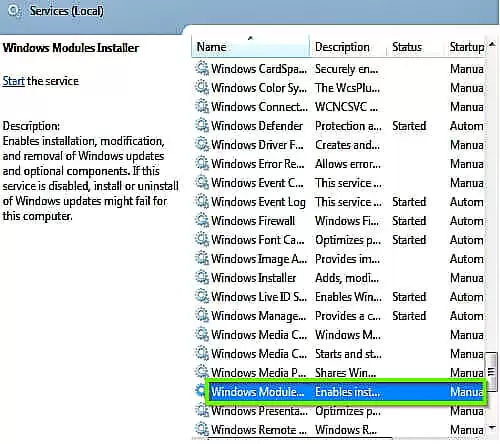
- From the new window, locate Windows Modules Installer. You can use the search tool provided in the top right corner of the window or simply press W on your keyboard to jump to services that start with W.
- Now double-click on the Windows Module Installer

- On the new window, find Startup Type and click on the run-down menu to change from automatic to manual
- Then click on the OK button
- Go back to the services.msc window and search for Windows Update.
- Change it to manual as you did in step 5 above
- Now go to Control Panel
- Locate Windows Update and click on it
- Go to Change Settings where you should be able to change how Windows updates itself
- Select Check for update but let me choose whether to download and install them and click on the OK button
- Close all windows and reboot your computer
Hopefully, you will not see the Windows Modules Installer error again
However, we recommend you manually check for updates at regular intervals. Missing critical updates means your Operating System will be unstable and you will encounter performance issues.
Change Your Internet Settings
You can also stop Automatic Windows update on your PC by changing your internet connection.
There are two ways to do this depending on the network you are using:
Way 1: Wi-Fi Network
Follow these instructions:
- Press the Start menu button > Settings > Network & Internet > Wi-Fi > Advanced Options
- Click on the button below Set as metered connection
That’s it. Now check if the problem persists.
Way 2: Ethernet Network
Follow these steps:
- Press the Windows key + R key on your keyboard to open the Run dialogue box
- Type regedit into the dialogue box and click OK
- Click Yes when prompt
- On the new window, open HKEY_LOCAL_MACHINE > SOFTWARE > Microsoft > Windows NT > CurrentVersion > NetworkList > DefaultMediaCost
- Right-click on DefaultMediaCost and choose Permissions
- Press Add and then type your user name in the text box under Enter the object names to select
- Click on Check Names and then OK
- Now choose the new user and then check the box right below Allow to enable Full Control.
- Then click OK and click all the windows
Restart your computer for the changes to take effect. This should now solve the problem. If not, please try the next method.
Fix TiWorker.exe
If you have changed your Windows update settings from automatic to manual and you’re still seeing the WMI error, you may have to fix TiWorker.exe. This executable file is built into Windows Update.
When experiencing high CPU usage due to WMI consuming most of your CPU resources, you can simply fix TiWorker.exe.
Follow these simple steps:
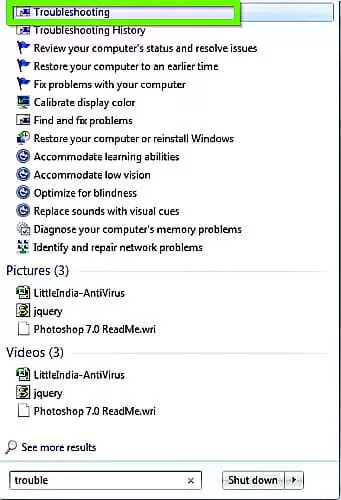
- Type Troubleshooting in the Windows search box and click on the correct option.

- If you are using an older version of Windows, go to Control Panel and search Troubleshooting
- From the new window, find View All on the left side and click on to proceed to the next step
- On the new window, locate System Maintenance and click on it.
- Wait a few seconds
Once done, restart your computer. This solution works for most users. However, if it doesn’t, feel free to try the next method.
Perform a Clean Boot
Another step you can take to fix the TiWorker.exe error is performing a clean boot. You have to do this using the Microsoft Configurations tools found in your Windows system.
This tool enables you to find both temporary and unwanted files on your computer. You can create some free space by deleting these files. In addition, it will get rid of unwanted processes and services from your CPU.
Subsequently, you’ll notice reduced CPU usage.
Here are the steps you need to follow to perform a clean boot:
- Type msconfig.exe in the Windows search box and hit Enter
- From the new window, select Normal startup and click OK
- Restart your computer for the changes to take effect
Once your computer powers back on, you won’t encounter the Windows Modules Installer Worker error.
FAQ
Can I End Windows Modules Installer Worker?
WMI is an important system component, but sometimes it can cause high CPU usage while trying to install new updates. If it is slowing your computer or interfering with your work, you can disable it.
To do this, press Ctrl+Shift+Esc to open Task Manager. Locate Windows Modules Installer Worker on the list. Right-click on it and select End Task.
This solution might be quick, but it might not help in the long run. After restarting your computer, the WMI High CPU usage error will come back.
What Is Windows Modules Installer Worker Windows 10?
TiWorker.exe is a service in your Windows 10 PC that looks for updates and installs them. However, sometimes this can cause high CPU usage and slow down your computer.
Why Is Windows Installer Not Working?
It Windows installed is not working properly, then you need to start it.
Here are the steps you need to follow:
- Type run in the Windows search box to open Run dialogue box
- Enter MSIExec, and hit Enter
- If you see a Windows Installer window that tells you everything about MSIExec, everything is good.
- But if you see an error, then you need to manually start it
- Right-click on the taskbar and choose Task Manager. Then Switch to Serves and find msiserver and start it.
Conclusion
These are the most effective solutions to the Windows Modules Installer Worker error. Hopefully, you were able to solve the problem using one of the methods listed. But if you don’t find a working solution, consider upgrading your system hardware.

Petr is a serial tech entrepreneur and the CEO of Apro Software, a machine learning company. Whenever he’s not blogging about technology for itechgyan.com or softwarebattle.com, Petr enjoys playing sports and going to the movies. He’s also deeply interested about mediation, Buddhism and biohacking.


