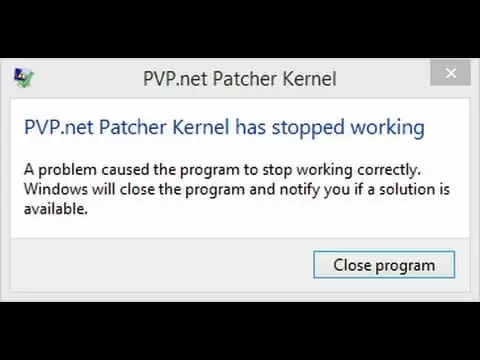
Commonly encountered by League of Legends game players, “pvp.net patcher kernel has stopped working” is a common error that stops the system from launching the game. Here are some simple ways that you can use to fix the “pvp.net patcher not working” error.
Ways to fix the “pvp.net patcher kernel has stopped working” error in Windows 10
There are quite a few ways to deal with this error. All of them are simple and do not require any special tools or applications.
Solution 1: Run the program with administrator credentials
The simplest way to fix this problem is by allowing the game to run under administrator credentials.
This is effective because when any application is given administrator access, it runs without any interruptions from the system firewalls.
Moreover, administrator access also prevents other system checks that are performed when the application is running in normal mode.
If the application runs successfully without any errors under administrator access, then you can change the properties of the application, allowing it to always run in administrator mode.
Read the steps below to grant administrator access to your application.
- Simply right-click on the application launcher icon and select Run as administrator
- If the application runs successfully, then proceed with the following steps
- Right-click on the application launcher icon again and then click on Properties
- Navigate to the Compatibility tab
- Now check the box that says Run this program as an administrator
- Then click on Apply to save the changes and then click on Ok to exit
Once done, launch the program again to see if it is working without any problems. This often fixes the error and allows the program to run smoothly.
However, if the problem persists, proceed to solution 2.
Solution 2: Ending the program
Whenever you launch the application and encounter an error, the program is still running in the background and its processing can be monitored from the Task Manager.
In this case, too, many users have found it effective to end the program from the Task Manager and restart it again, only to not find an error prompt this time.
This is mainly because when you end a program, the system closes the program with everything related to it and also eliminates the data that was stored in the memory from its last error encounter.
After ending the program, start it again with administrator access to solve the problem entirely. Simply follow the steps below to fix the problem.
- Launch the application and wait for the error to show up
- Once the error shows up, press Windows Logo Key + R to start up Run
- Now type in taskmgr to launch the Task Manager
- Navigate to the Processes tab and look for your application name
- Once found, right-click on the application process and click on End task
- After the program closes completely, right-click on the application icon and click on Run as administrator
- Check if the program runs without any problems
- If the application runs successfully, click on the application icon again and then click on Properties
- Navigate to the Compatibility tab and check the box that says Run this program as an administrator
- Click on Apply to save the changes and then click on Ok to exit
If this still doesn’t work for you, then proceed with solution 3.
Solution 3: Removing game patch files
It is highly possible in some cases that the game patch files are corrupted or there is a problem in their configuration, hence the problem.
In this situation, removing some patch files can solve the issue. When some patch files are removed, the application will automatically download them and fill the space created.
This should fix the corrupted patch files and reconfigure them to work like they are supposed to. Read the steps below to do so.
- Right-click on the application icon and click on Open file location
- Now look for the folder named RADS and open it
- Now follow the path: Projects > lol_air_client > releases, then open the latest folder present there
- Look for the files named “S_OK” and “releasemanifest,” then delete them
- Now open the “deploy” folder and delete the files named “properties,” “META-INF,” “logs,” and “LoLClient.exe”
- Once done, restart your computer
This should solve the “pvp.net patcher kernel has stopped working” Windows error.
Conclusion
“Pvp.net patcher kernel has stopped working” is an annoying but simple launch error faced by many League of Legends game players.
It usually occurs because the application does not have administrator access, and sometimes because some of the patch files are corrupt.
You can fix this problem by either providing administrator access to the game or by deleting some of the corrupted patch files.
The simple step-by-step methods mentioned above will help you fix the problem and allow you to run the application smoothly.

Petr is a serial tech entrepreneur and the CEO of Apro Software, a machine learning company. Whenever he’s not blogging about technology for itechgyan.com or softwarebattle.com, Petr enjoys playing sports and going to the movies. He’s also deeply interested about mediation, Buddhism and biohacking.

